What's Included in a Solar System Diagnostic Visit?
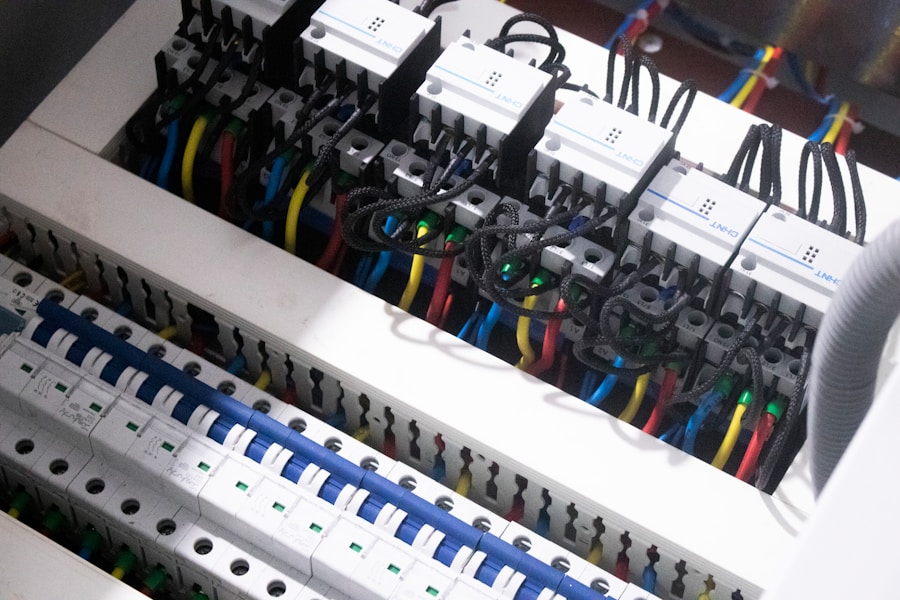
What We Actually Check
When your solar system isn’t producing the way it should, it’s tempting to jump straight to replacing parts. Maybe you’ve searched an inverter error code online, noticed lower production in your monitoring app, or heard from someone that “it’s probably the inverter.”
The reality is that many different problems can cause similar symptoms, and replacing equipment before identifying the actual issue often leads to unnecessary repairs and expenses.
That’s why a solar system diagnostic visit is the first step in almost every repair.
The purpose of a diagnostic isn’t to sell you replacement equipment or recommend the biggest repair possible. It’s to answer one simple question:
What is actually causing the problem?
By combining production data, system history, visual inspection, and electrical testing, a technician can determine whether the issue is something simple—like dirty panels or a tripped breaker—or something more involved, such as a failed optimizer, damaged wiring, inverter fault, or animal damage.
A proper diagnosis eliminates guesswork and gives you a clear understanding of what’s happening with your system before any repair decisions are made.
Why a Diagnostic Visit Comes Before Any Repair
Many solar issues produce similar symptoms.
For example, lower energy production could be caused by:
Dirty solar panels
Bird droppings
New tree shade
A failed microinverter
A failed optimizer
Loose electrical wiring
A tripped breaker
Inverter faults
Ground faults
Communication problems
Damaged solar panels
Animal damage
From a homeowner’s perspective, all of these problems often look exactly the same:
Your system simply isn’t producing enough electricity.
Without testing the system, it’s impossible to know which component is responsible.
Replacing parts based on assumptions often costs more than performing a proper diagnosis first.
Step 1: Reviewing Your System’s Production History
Every diagnostic visit begins with understanding how your solar system has been performing.
Modern solar monitoring platforms record valuable historical information that helps narrow down the source of a problem.
Depending on your equipment, a technician may review:
Daily production
Monthly production
Year-over-year trends
Individual panel performance
String production
System uptime
Historical alerts
Communication logs
Production history often reveals whether the issue developed gradually or appeared suddenly.
For example:
A slow decline over several months may suggest dirt buildup, shading, or aging equipment.
A sudden drop during one afternoon may point toward an inverter shutdown, breaker trip, or equipment failure.
Historical data provides important clues before any physical inspection even begins.
Step 2: Reviewing Error Codes and System Alerts
If your inverter or monitoring app has displayed warning messages, those alerts become another valuable piece of the puzzle.
Technicians review:
Inverter fault codes
Communication alerts
Grid warnings
Ground faults
Arc fault history
Isolation faults
Temperature warnings
Offline notifications
It’s important to understand that these alerts don’t automatically identify the failed component.
Instead, they point technicians toward the area of the system requiring further investigation.
For example, a ground fault may originate from damaged wiring, moisture intrusion, loose connections, or another electrical issue.
The diagnostic process identifies which one is actually responsible.
Step 3: Visual Inspection of the Solar System
After reviewing the system data, the next step is a thorough visual inspection of all safely accessible components.
Many solar problems leave physical evidence.
During this inspection, technicians look for signs of:
Cracked solar panels
Broken glass
Burn marks
Loose mounting hardware
Damaged conduit
Loose wiring
Corrosion
Animal damage
Bird nests
Missing critter guard
Debris accumulation
Water intrusion
Loose connectors
Even if none of these issues immediately explain the production loss, documenting the condition of the system provides valuable context for further testing.
Step 4: Inspecting the Inverter
Because the inverter is responsible for converting solar electricity into usable household power, it’s one of the most important components inspected during a diagnostic visit.
The inspection may include:
Operating status
Indicator lights
Error history
Display messages
Ventilation condition
Cooling operation
Physical condition
Internal temperature
Audible alarms
The inverter often provides important information about where the troubleshooting process should continue.
Step 5: Inspecting Electrical Connections
Loose or damaged electrical connections are more common than many homeowners realize.
Solar systems experience years of expansion and contraction due to changing temperatures.
Over time, connections may loosen or degrade.
Technicians inspect accessible wiring for signs of:
Loose terminals
Heat damage
Corrosion
Water intrusion
Burn marks
Improper connections
Physical damage
Electrical issues frequently produce intermittent production problems that are difficult to identify without systematic testing.
Step 6: Checking Breakers and Disconnects
Sometimes the problem isn’t located on the roof at all.
The diagnostic inspection also includes checking accessible protective devices such as:
Solar breakers
AC disconnects
DC disconnects
Service disconnects
A breaker that has tripped or a disconnect that isn’t operating properly can prevent the system from producing electricity.
If protective devices continue tripping, further testing is performed to identify the underlying cause rather than simply resetting them.
Step 7: Testing Panels, Strings, or Individual Components
If the visual inspection doesn’t immediately identify the issue, electrical testing becomes the next step.
Depending on your system design, technicians may test:
Individual solar panels
Panel strings
Optimizers
Microinverters
DC voltage
AC voltage
Current output
Continuity
Electrical resistance
These measurements help isolate exactly where production is being lost.
Instead of replacing every component connected to the system, testing identifies the specific section responsible.
Step 8: Looking for Environmental Issues
Not every solar problem is electrical.
Environmental factors often play a major role in reduced production.
During the inspection, technicians evaluate:
Tree shading
New structures
Dirt accumulation
Bird droppings
Smoke residue
Leaves
Debris
Animal activity
Sometimes the solution is as simple as trimming vegetation or scheduling a professional solar panel cleaning.
Identifying these issues first prevents unnecessary electrical repairs.
Step 9: Comparing Expected vs. Actual Production
One of the most valuable parts of a diagnostic visit is determining whether your system is actually underperforming.
Many homeowners compare today’s production with yesterday’s without considering:
Weather
Temperature
Day length
Seasonal changes
Air quality
System size
Technicians compare your system’s actual production against what would normally be expected for:
Your location
Time of year
Weather conditions
Roof orientation
System size
This helps determine whether your system truly has a performance problem or is simply operating under changing environmental conditions.
Explaining the Results in Plain Language
Technical error codes and electrical measurements don’t mean much if they’re not translated into understandable information.
At the end of a diagnostic visit, you should leave with clear answers—not more confusion.
A good technician should explain:
What was found.
What’s causing the issue.
Whether repairs are needed.
Which repairs are recommended.
Whether the system is safe to operate.
Whether the issue is urgent.
What can wait.
What future maintenance may be helpful.
The goal is for you to understand the condition of your solar system well enough to make an informed decision.
Not Every Problem Requires a Major Repair
One of the biggest misconceptions homeowners have is that a diagnostic visit automatically leads to expensive repairs.
In reality, many service calls uncover relatively minor issues.
Examples include:
Dirty solar panels
Bird droppings
Tree shading
Loose communication cables
Tripped breakers
Monitoring problems
Minor wiring adjustments
Even when a larger repair is necessary, identifying the exact problem first prevents replacing components that are still working properly.
A proper diagnosis often saves homeowners money by narrowing repairs to only what’s actually needed.
When Is a Diagnostic Visit a Good Idea?
Scheduling a solar diagnostic inspection makes sense if you’ve noticed:
Lower energy production.
Higher utility bills.
Inverter error codes.
Monitoring alerts.
Flat production graphs.
One panel underperforming.
Repeated breaker trips.
Bird activity beneath the panels.
Damage after a storm.
Unexplained production changes.
Even if the issue turns out to be minor, confirming your system is operating correctly provides valuable peace of mind.
The Goal Is Answers—Not Guesswork
A solar system diagnostic visit isn’t about replacing equipment—it’s about understanding your system. By reviewing production history, analyzing inverter alerts, inspecting the solar array, checking accessible wiring and electrical components, and performing targeted testing when necessary, a technician can identify the true cause of reduced performance instead of relying on assumptions.
Whether the solution is a professional solar panel cleaning, replacing a failed microinverter or optimizer, repairing damaged wiring, correcting a communication issue, or simply monitoring a minor concern, you’ll know exactly what’s happening and why.
Most importantly, you’ll receive a straightforward explanation in plain language, along with honest recommendations about what should be repaired, what can safely wait, and whether the repair is worthwhile. The goal isn’t to recommend more work than necessary—it’s to give you the information you need to make the right decision for your solar system and your home.
Ready to schedule a diagnostic visit? See our solar diagnostics service in Salt Lake County.